
How To Create Your Own Instagram Story Highlight Covers
I've had a lot of people ask me lately how to get the cute round icons on their Instagram highlights, so I thought a quick, step-by-step tutorial would make for a great post!
Highlights are literally just old Instagram stories that you've posted, but gives you the opportunity to pull them out of the Archives, and feature them under your bio, even after 24 hours.
Since you can create multiple highlight reels, you can easily split these into categories, and then make the covers fit the category. Check out the tutorial below to find out how to make your own!
STEP 1: OPEN A DESIGN SOFTWARE.
I prefer to use Canva for this, but you could definitely put these together with other editors and softwares. So, first things first, sign in to Canva (if you don't have Canva, you'll need an account - it's free!).
It should say Create A Design, and you'll need to click the button in the upper right corner that says "Custom Dimensions."
Set the width to 1080px and the height to 1920px and click Design!
STEP 2: CHOOSE YOUR BACKGROUND.
On the menu to the left, there's a tab for Backgrounds. Here you can choose any color, or choose one of the free patterns from Canva. Take your pick, and it will automatically add it to your cover.
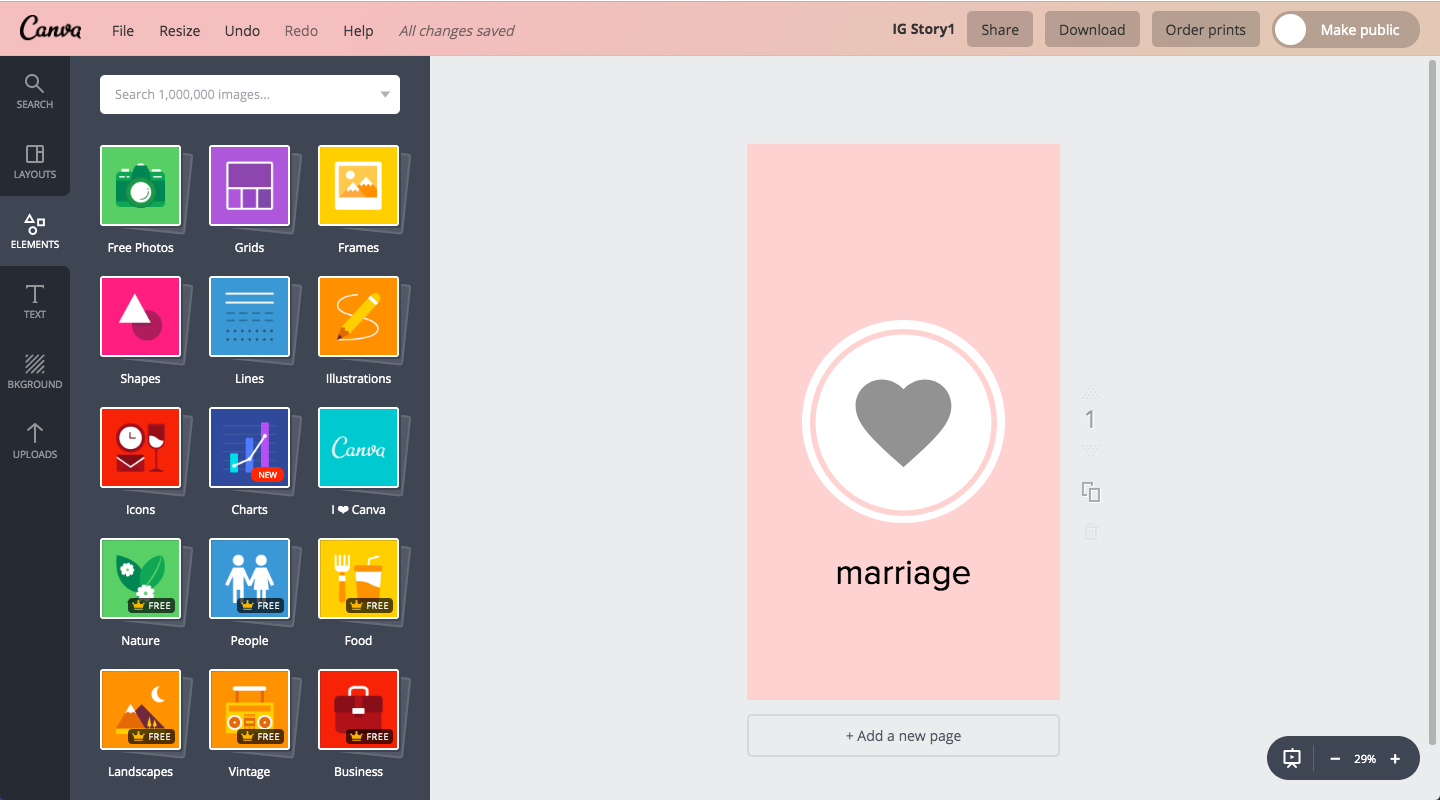
STEP 3: ADD ICONS AND TEXT.
This is where you can get really creative, and really brand these to your business or feed. I used icons from Canva and changed the color, but you can also use icons you found elsewhere.
To use Canva's icons, click the Elements tab in the menu, and either search for what you're looking for or scroll through the thousands of Illustrations and find something you like. To use your own icons, click the upload tab, to add it to your upload folder.
Once you've picked your icons, add them to the template, change the color if you'd like, and make sure they're perfectly centered.
If you want to add text, click the Text tab, choose your font and colors, and drag it into place.
Note: Be careful not to overcrowd the template. Remember that when you add it as a cover, only a small round area in the middle will actually show up.
Related Post: The Best Tools To Stay Organized In Your Business
STEP 4: UPLOAD TO INSTAGRAM.
Now that you've got the design you want, save and download it, then head over to your Instagram.
Add the photo you just created to your Instagram story.
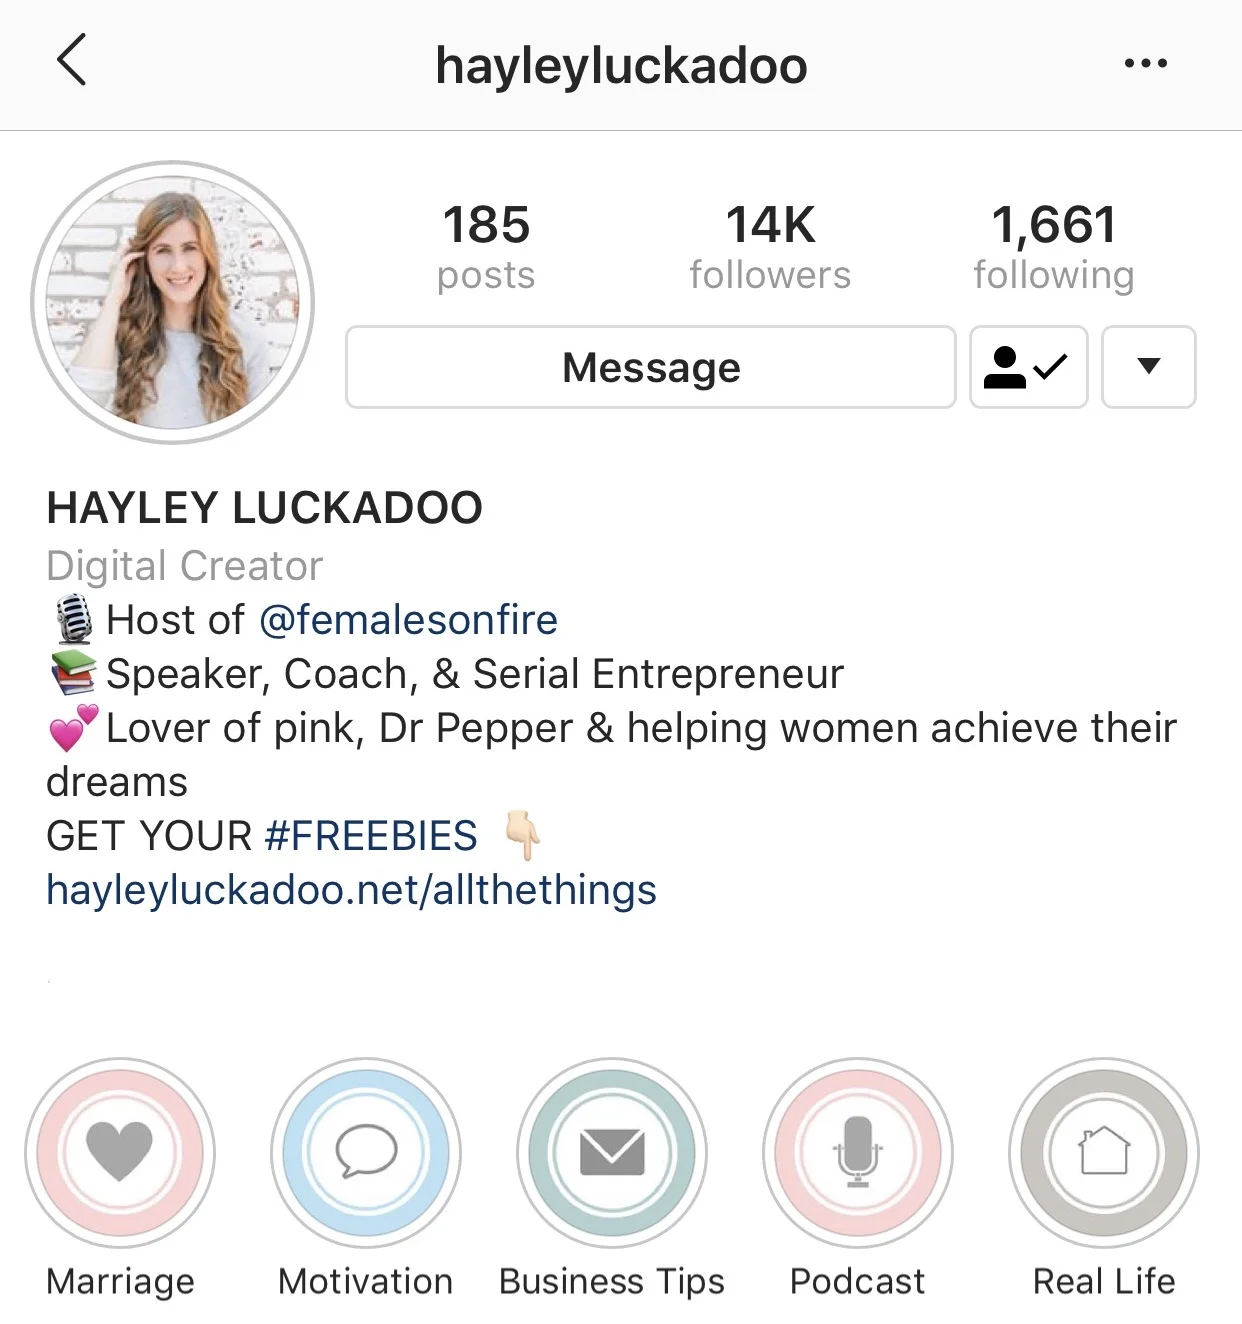
STEP 5: ADD YOUR HIGHLIGHT.
Go to your Instagram feed and click the + button labeled "New" under your bio. This will show you all the Instagram stories in your archive.
Choose the cover photo that you just uploaded.
Name your highlight (this should be the category name you picked - for example, blog posts, travel, real life, etc.). Click Add.
STEP 6: REPEAT AS NECESSARY.
Repeat this process for as many categories as you'd like.
STEP 7: ADD HIGHLIGHTS TO THE APPROPRIATE CATEGORY/COVER.
To add stories to a highlight, click the highlight and click the 3 dots (...) in the lower right corner. Click "Edit Highlight" and select all the stories you want to highlight in that category.
Note: Highlights will show stories in the order they happened. If you add stories from before you created the cover to a highlight, the cover will show up after the old stories when you watch it, even though it shows up as the cover for that highlight. I recommend only adding to your highlights moving forward, and not adding old stories to them.
That's it! It's super easy to create these, and the great thing is that you can redesign or upload new ones any time. Have fun creating your covers!
If you want done-for-you Instagram highlight covers that you don’t have to spend any time on, check out the ones in my shop here!


Follow me on Insta!


